
Check that the lower piston of the air spring is seated correctly in its locking pins and that the top mount is correctly fitted. Always use new Voss fittings and tighten them to maximum 2 Nm. Support the vehicle weight while inflating the air spring. Check the shock absorbers and, if there is a compressor fault, the compressor as well.
Being the aftermarket air suspension specialist, Arnott is keen to make sure all installers feel confident and are well informed when working on air suspension systems. In this article, we provide you with some valuable tips and tricks for an air spring replacement.
Air springs
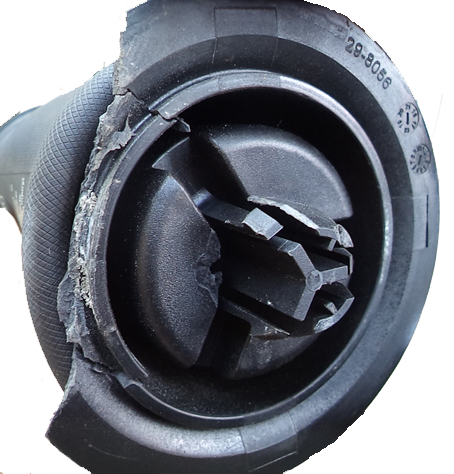
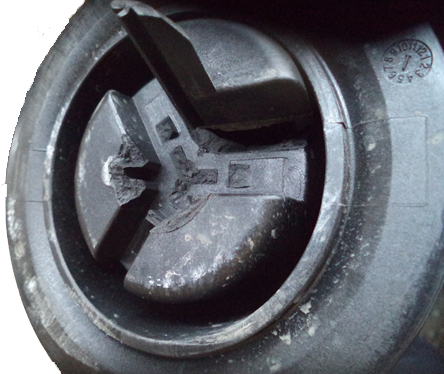
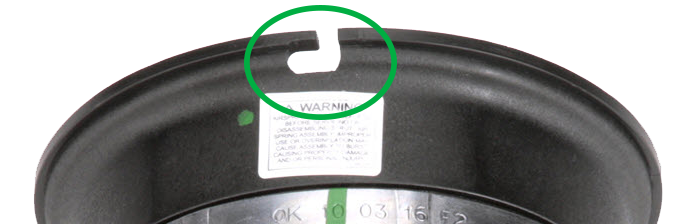
When installing a new air spring, always make sure to double check that the lower piston is mounted correctly and seated/engaged in the mounting pins/locks. Otherwise, the lower piston can break, or the air spring can dislodge from its location.
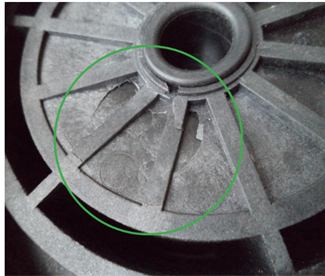
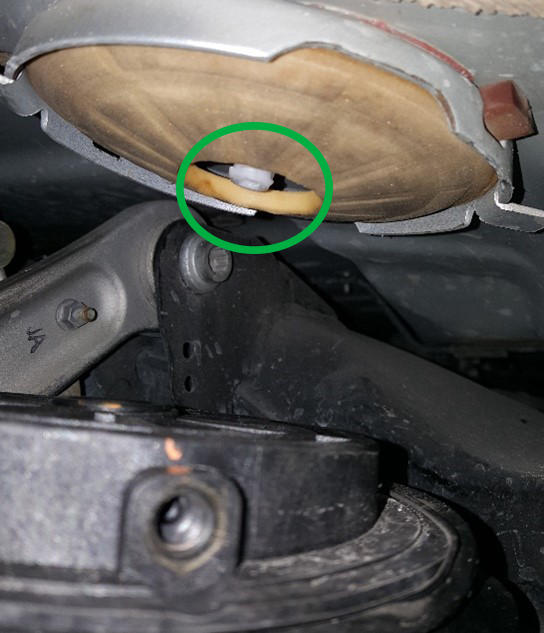
For some applications, it is also necessary to check if the top of the air spring is mounted correctly onto the location pin. If not secured, the bellow will be pressed against its top mounting point/clip when inflating. This leads to a perforated top piston and thus a leaking air spring.
Voss connector
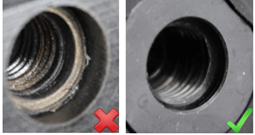
Never reuse old VOSS connectors! The rubber seal gets damaged easily when reusing which can lead to an air leak on the connector. If required, tighten the Voss fitting with maximum 2Nm. When more torque is applied, it can damage the screw-thread and cause leakage
Air lines
Before inserting the air line, check it for scratches and cuts because these can lead to possible leaks.
If present, use a proper cutting tool to cut away the bad section. Then fully insert the clean air line into the VOSS fitting and press until firmly seated. Give it a short pull to fix it and ensure a secure connection.
After insertion, make sure to verify that the air line is properly placed and routed. If the air line is not in the right location, it can get dented or damaged over time. In some cases, neglecting to use the proper routing/guiding can cause the air line to get squeezed in between the top of the air spring and the chassis immediately after inflation, making it impossible to deflate the air spring through the air line afterwards!
Air spring inflation
Air springs should be mounted as supplied. Stretching or pressurizing the air spring does not make it easier to install but it can cause damage by folding incorrectly during inflation to reach the operational working pressure.
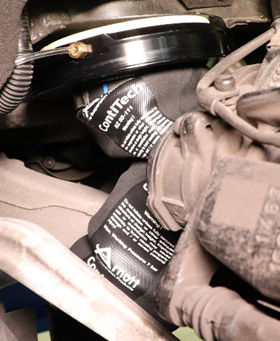
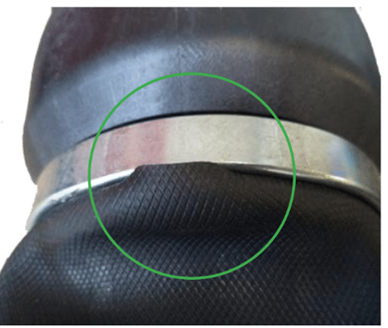
Always support the vehicle weight whilst inflating the air spring. If neglected, the vehicle weight is unevenly distributed. Consequently, the air spring can bend during the air up procedure. This puts enormous stress on the air sleeve, risking the bladder being pushed out of the crimping ring. The information above describes the general inflation method. For specific (model-specific) inflation procedures always consult and follow the manufacturer’s instructions!
Final system check
When replacing an air spring, there are a few things to keep in mind. When only replacing the worn air spring, the shock absorbers should be inspected critically for both function and oil leakage. The damping force of a worn shock absorber is considerably lower, this means the air spring is being exposed to impacts which it was not designed for. It will get damaged easily requiring an earlier replacement. Secondly, in case the air spring is mounted onto a strut, the oil deteriorates the rubber sleeve and would consequently shorten the new air spring’s lifespan.
If the leaking air spring remained unnoticed for a longer period, the leak could have affected the compressor as well. A leak in the system causes the compressor to run too often or continuously, eventually overheating it. The compressor is then no longer able to deliver the required pressure to raise the vehicle adequately, or it will take much longer than usual. Most diagnostic tools have the functionality to run a compressor check or to measure the maximum output pressure to check the condition. Based on the outcome of these tests, an air compressor replacement could be advised.
Choose the right part
Frequently asked questions
Why check the lower piston during installation?
If the lower piston is not seated correctly in its locking pins it can crack, or the air spring can dislodge from its location.
Can I reuse old Voss fittings?
No, always use new ones. The rubber seal can be damaged when reusing, and the fitting should be tightened with maximum 2 Nm to avoid thread damage and leakage.
Why support the vehicle when inflating the air spring?
Otherwise the air spring can bend incorrectly, which damages the air line and the crimping ring. Mount the air spring as supplied and do not stretch or pressurize it beforehand.
What should I check at the end of the replacement?
The shock absorbers for oil leakage or lost damping force, since a worn shock absorber can wear out the new air spring prematurely. Also check the compressor condition and measure the output pressure with a diagnostic tool if a leak went unnoticed for long.
Find the right part for your car. Search by OE number or choose make and model.
Choose your make